Make a movie in four simple steps
With Windows Live Movie Maker, you can quickly go from just watching movies to making your own great-looking home movies and sharing them with your family and friends.
Windows Live Movie Maker is part of Windows Live Essentials and might already be installed on your computer. To see if Windows Live Movie Maker is already installed, click the Start button ![]() , type Windows Live Movie Maker, and see if it appears in the list of results. If it doesn't, you can download and install it for free from the Windows Live Movie Maker
website.
, type Windows Live Movie Maker, and see if it appears in the list of results. If it doesn't, you can download and install it for free from the Windows Live Movie Maker
website.
Step 1: Get videos and photos onto your computer
First, you need to import the videos and photos that you want to use in your movie from a device onto your computer. (If the photos and videos are already on your computer, you're ready for step two.)
Here are two popular ways to get photos and videos onto your computer:
-
Import photos and video files from a digital camera, video camera, or mobile phone. Connect your device to your computer using a USB cable, and then import the photos and videos.
-
Import video directly from your digital video (DV) camera. This is what you’d do if you taped your family vacation and wanted to get the footage onto your computer and edit out unwanted parts.
To get started with importing photos and videos, in Windows Live Movie Maker, click the Movie Maker button ![]() , and then click Import from device.
, and then click Import from device.
Step 2: Start editing
After you’ve got your files on your computer, you're ready to start editing.
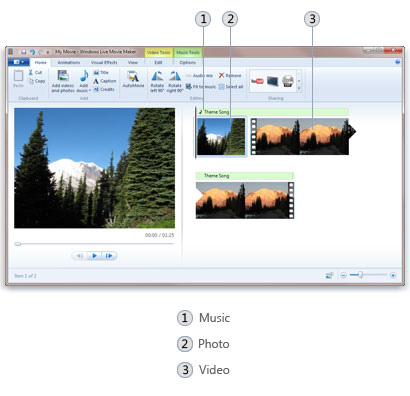
Add videos and photos to your project in Windows Live Movie Maker. The photos and videos appear on the storyboard automatically. Now's a good time to add music, too. Everything that appears on the storyboard will be in your final movie. To add videos and photos, on the Home tab, in the Add group, click Add videos and photos.
Trim and arrange items on the storyboard. Next, trim videos on the storyboard to hide any parts of videos that you don’t want to show in your final movie. You can also move items from one spot to another by dragging them or split videos into two. To trim a video, go to the part of the video that you want to show in your movie, and then, under Video Tools, on the Edit tab, in the Editing group, click Set start point or Set end point (depending on if you want the video to start or stop showing at that point in it).
Step 3: Add transitions, effects, and text
Now, it’s time to take your movie to the next level by adding special, personal touches, such as transitions, effects, and text.
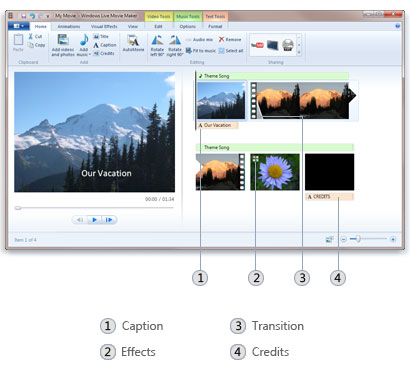
Transitions. To make your movie look nice when one video or photo ends and another begins to play, add transitions between photos, videos, and titles on the storyboard. There are more than sixty different transitions in Windows Live Movie Maker to choose from, so play around and use the transitions that look nice to you. To add a transition, click the photo or video you want to add a transition between, and then, on the Animations tab, in the Transitions group, click a transition.
Pan and zoom and other visual effects. You might want to add some special effects to videos and photos on the storyboard that’ll give your movie the appearance you want. For example, add one of the Black and White effects to photos and videos to give your movie an old-time or more dramatic look. If you want to show a close-up of one of the stars in your movie, add a pan and zoom effect to the photo. Remember, you can use multiple effects and your own creativity to get the look you want for your movie. To add a visual effect to a selected photo or video, on the Visual Effects tab, in the Effects group, click the effect that you want to apply.
Titles, captions, and credits. You can add a title at the beginning of your movie that tells people a little bit about it, such as when, where, and what happened. If you have a specific video or photo you want to describe in your own words, add a caption. And, finally, don’t forget to add credits at the end of your movie to tell the world who created and starred in it (just like you see in movie theaters and on DVDs). To add a title, caption, or credits, on the Home tab, in the Add group, click one of the text options, and then enter the text you want.
You can preview your project at any time by clicking the Play button under the preview monitor in Windows Live Movie Maker.
Step 4: Publish your movie and share it with other people
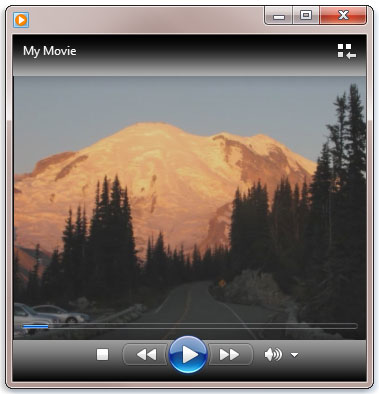
When you’re happy with your project, you’re ready to save it as a movie and share it with friends, family, or the whole world, if you want. You can share your movie in a variety of ways—including publishing it on a website (such as YouTube), burning it to a DVD to watch on TV (if your computer is running one on of the following editions of Windows: Windows 7 Home Premium, Windows 7 Professional, Windows 7 Enterprise, Windows 7 Ultimate, Windows Vista Home Premium, or Windows Vista Ultimate edition), or by sending it in e‑mail or in an instant message later on. You can also save your movie on your computer and then use a media player, such as Windows Media Player, to watch it on your computer.


